V2V Converter - VMware to Hyper-V
Prerequisite
StarWind V2V Converter (9.0.1.268)
Create a new folder called HyperV
Then Create sub folders for the converted VM's
example C:\HyperV\DEMO10
Make sure Users have Modify Permissions on the folder
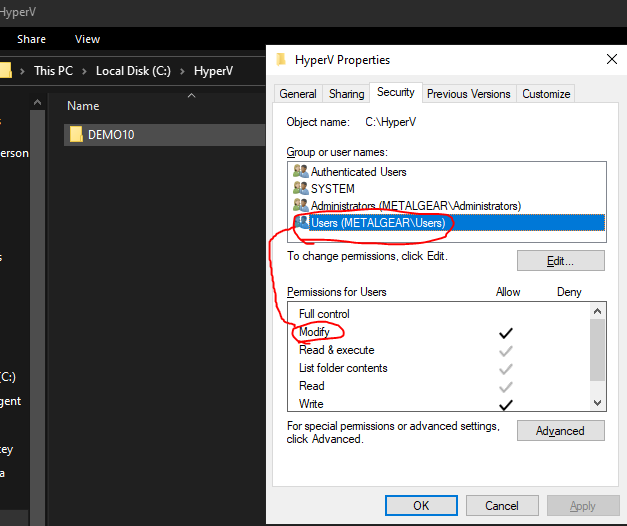
Then Create sub folders for the converted VM's
example C:\HyperV\DEMO10
Make sure Users have Modify Permissions on the folder
Install V2V Converter
Launch the downloaded executable. The Setup Wizard appears.
Read and accept the License Agreement. Click on Next to continue.
Read and accept the License Agreement. Click on Next to continue.
Accept all defaults and Click on Next to continue.
Click Finish to complete Installation
Converting to VHD/VHDX
Double-click StarWind V2V Converter shortcut on a desktop, choose Local file and click Next to proceed
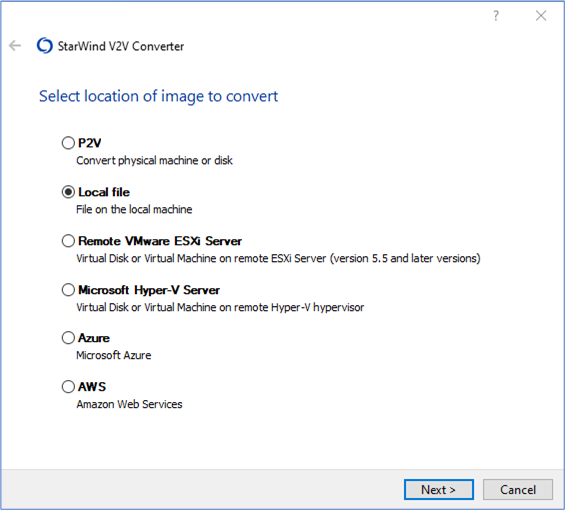
Specify the Source image location. It can be .vhdx/.vmdk/.qcow2/.img image on a local PC/Server or on an SMB share. Click Next.
Here we are pointing to the DEMO10 VM as an example.
Here we are pointing to the DEMO10 VM as an example.
Choose Local file option and click Next to proceed.
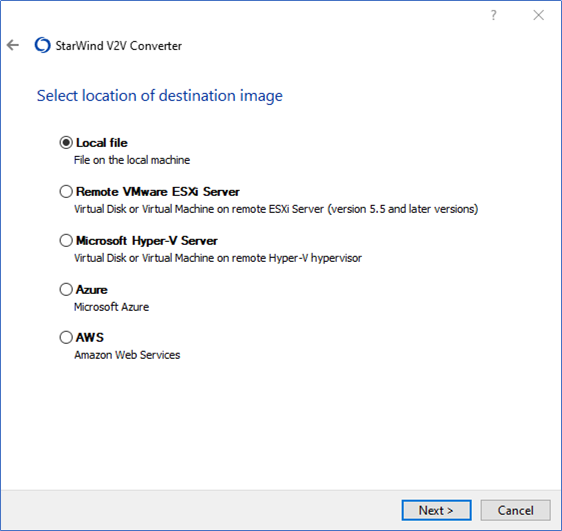
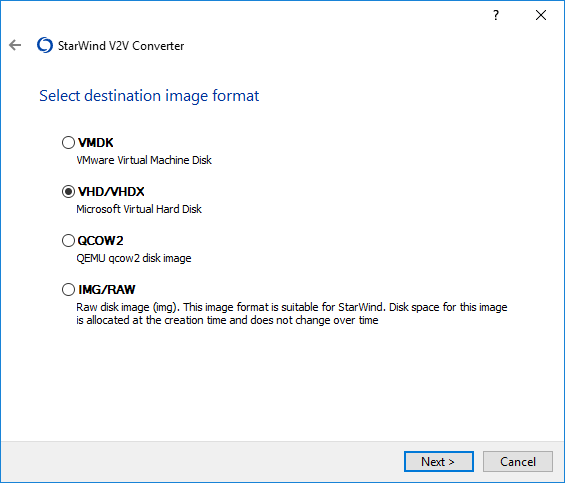
Select destination image format and click Next to proceed. It can be .vhdx/.vmdk/.qcow2/.img
In this example we will be selecting VHD/V
For vhd/vhdx destination image format growable or pre-allocated image type must be chosen
Select VHDX growable image then click Next to proceed
Select VHDX growable image then click Next to proceed
Set the destination file options. Click "…", select the file location Created under the prerequisite section
Then Click Convert
Wait for the conversion process completion and click Finish to complete the Wizard.
Related Articles
Hyper-V - Basic Management
Hyper-V Manager Open the Start Menu and search for Hyper-V Manager Application Create a VM Under the actions pane on the right Select New Click On Virtual Machine Click Next Specify Name and Location Set the Name of the VM in this example we will ...Enabling Hyper-V in Windows
Windows 10\11 Open a PowerShell console as Administrator. Run the following command Enable-WindowsOptionalFeature -Online -FeatureName Microsoft-Hyper-V -All hit enter to restart references: https://learn.microsoft.com/en-us/virtualization/HyperV - Icons pixelated inside VM
I want to use the Hyper-V VM demo environment , but one thing holding me back is the resolution. Fonts are pixelated, like on an old-style thin client. This was the same for this VM when it ran on VMWare. First in Hyper-V Manager, had to check and ...Install VMWare virtual machine with Infor software loaded/demo environment
Resources: Demo10.zip Workstation Player 17 Steps: Download the zip file to your PC using the Demo10.zip link above. This may take some time depending on your internet connection. Create a folder on your C: drive named VM. Adjust permissions on the ...How to Output SmartViews Installation Log
If there is an unexpected issue when running the SmartViews installer, run it via the command line using the command below to output a log file. This can be helpful either to you or to a Synergy employee to help diagnose the reason why the install ...